Many of you have heard about Pinterest but may have no idea how to use it or what it’s about. Others still haven’t ventured onto it because you have heard it is addicting and you don’t have the time. You may be right on that last part.
Pinterest is a website where you collect, display and share images and links to all websites you love. What’s so great about that?  Well, if you are planning a project you can browse through thousands of user’s boards and pins and find inspiration or ideas for your own project. You can then pin them to your own board for safe keeping and to reference later. The same is true for all categories in the collection. Whether it’s home decor, weddings, food, DIY projects or technology, there really is something for everyone.
Here I’m going to show you how to easily use the site so you can share my love of all things Pinterest!
1. Get An Invitation
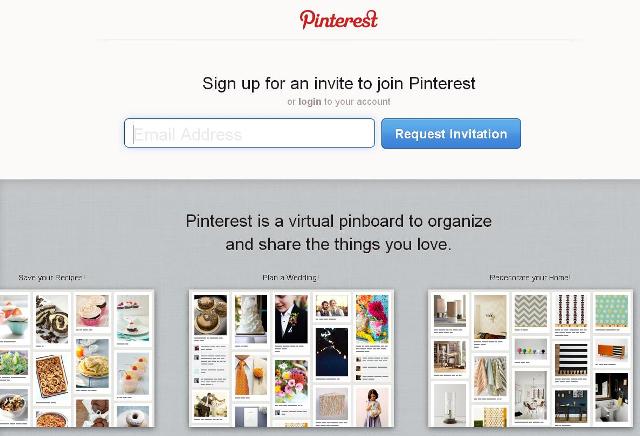
I’m not sure why you have to be invited to the site before you can join, but it’s still a requirement. There are two ways to be invited. The first way is to go to the Pinterest homepage and click “Request an Invite†and then fill out the form and wait. The second, and much quicker way, is to have a Pinterest member invite you through their account. (I can hook you up! Just ask in the comments sections.) An email confirmation will be sent to you, letting you know that your invitation has been accepted and you can begin building your boards.
While you wait for your invite, you can browse the home page and see what Pinterest has to offer. The page gets populated with pins and repins by users, so there’s always something new to see.
2. Find Friends
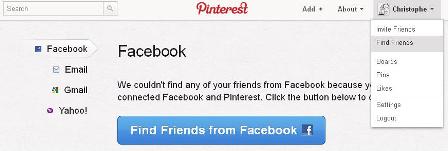
Once you have your account, you will want to add friends so you can share your finds with them! Under your name in the top right, you will see the “Invite Friends†and “Find Friends” tabs. Clicking that will open a window where you can invite Facebook Contacts or enter email addresses of people you want to invite.
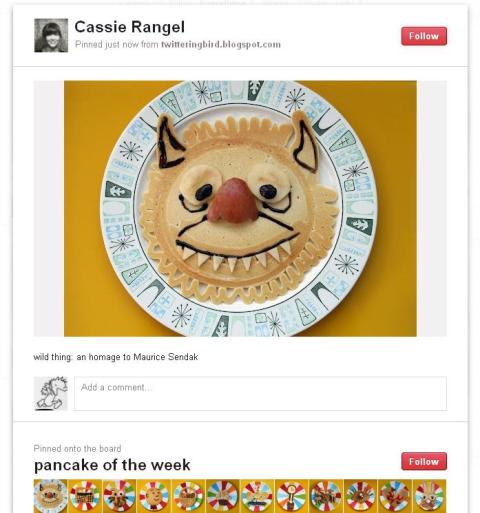
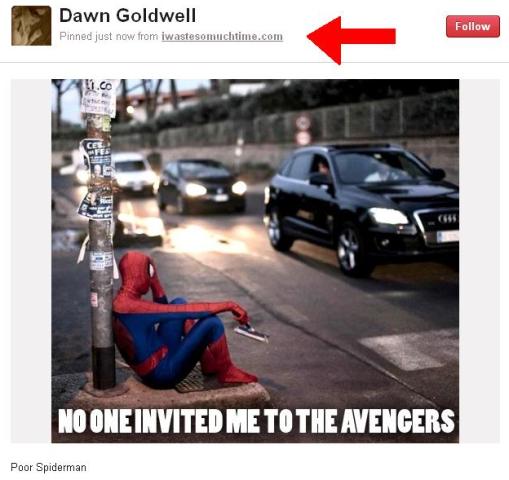
You can also add other Pinterest users or follow their boards. To do this, click on a pin (a picture that has been added to the feed.) It will open that full post with the user’s name and the board they posted that pin to. If you want to follow the person, click on their name. If you want to follow the board, click “Follow†under the board displayed on the left. (Mine says “Edit†because it’s my pin but that is where the “Follow†button would be)
3. Reading Pins
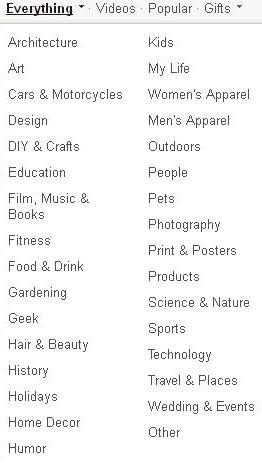
Find a category you want to search in by hovering over the “Everything†tab in the top menu. A drop down menu will display all the categories you can view user’s interests in.
After you select a category you can browse through all of the pins. To read a pin, click on the image you want to know more about. When the new window opens, click on the URL in the top right corner. You will be re-directed to the website that the post was originally pinned from.
4. Creating Pin Boards
It won’t take you long before you find something you think is “Pin Worthy”. When you hover over the pinned article, you will see three buttons, “Like†and “Repinâ€. If you “Like†something it’s much like Facebook, your name just gets added to a running list. If you “Pin†something, you save it to one of your boards for future reference. If you “Comment†you are obviously leaving a comment for everyone to read about the post.
5. Creating Boards and Pinning Images
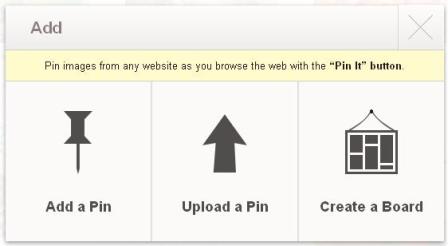
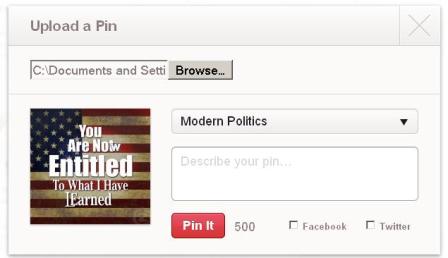
Creating your own boards is the best part of the experience. Your account will come with generic boards already named for you so you can pin to those or create your own. To begin pinning things to your boards click on the “Pin†or “Add” button. When the new window opens, click the drop down menu, and either select a board from the menu or click “New†and name a new one. Add a description to the body and “Pin It.†It is now saved on your board! You can make as many boards as you want in any categories that suit your taste. You can also add content to Pinterest and create your own pins. Go to the tool bar in the top right corner and click “Add.†This will open a window with three options. You can “Add Pin†by entering the URL of the site you want to pin from, “Upload A Pin†from something saved on your computer, or “Create a Board†to post items to.
6.View Your Boards
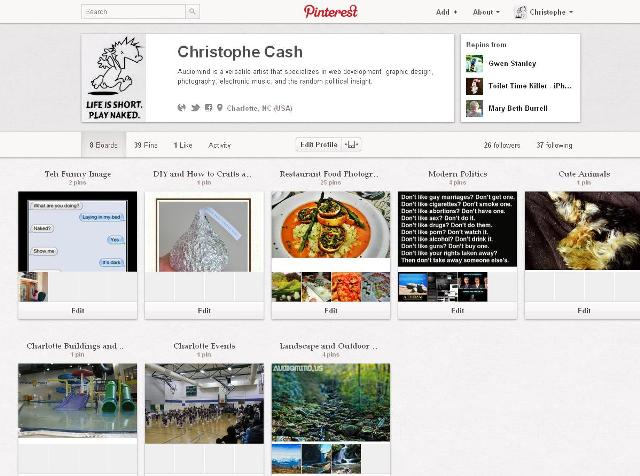
If you want to browse your boards, just hover over your name in the top right corner, scroll to boards. It will open your page displaying all of your boards in the middle and all of the people who you follow in the left column.
You can rearrange the boards by dragging them to the order you want. You can also edit any of the boards by clicking “Edit†under the board you want to make changes to.
And there you have it! I am sure you will find numerous things to like, pin and comment on! Don’t forget to add me as a friend and share here what you love most about Pinterest! http://pinterest.com/audiomind/


Leave a Reply to Gracie Cancel reply